If you're looking to expand your system partition (C: drive) on Windows 11 or 10, using DiskPart can help you efficiently manage partition sizes, including shrinking and extending them.
By increasing the size of your C: drive, you can better utilize any available or unallocated space on your hard drive. Expanding the system partition can significantly enhance your computer’s performance, potentially leading to faster speeds and improved system efficiency.
Using Disk Management to Expand the C: Drive Disk Management is a built-in utility that can help you extend your system partition if there is unallocated space directly following the C: drive.
Important Note:
When using Disk Management to extend your system partition on Windows 11/10, there must be adjacent unallocated space next to your system partition (C: drive). If no such space exists, you won’t be able to extend the partition. In such cases, a third-party tool like EaseUS Partition Master may be necessary.
Here’s how to extend your system partition using Disk Management:
Step-by-Step Guide to Expanding the C: Drive:
-
Open Disk Management:
Right-click the Windows icon on your taskbar and select "Disk Management" from the menu. -
Select the Partition:
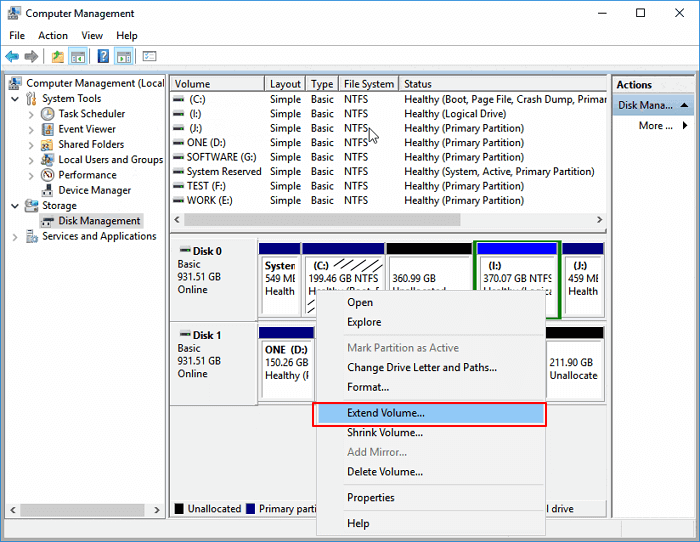
Right-click the system partition (usually labeled C:) that you want to extend, and from the menu, choose "Extend Volume."

- Add Unallocated Space:
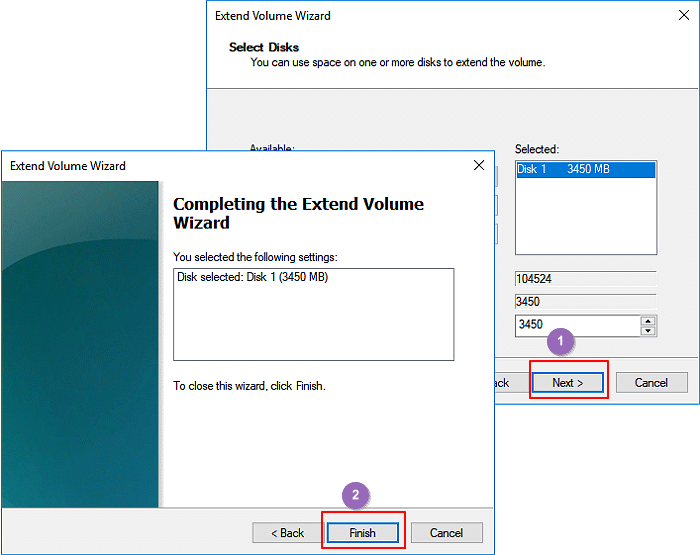
In the "Extend Volume Wizard," click "Next," then specify the amount of unallocated space you want to add to the C: drive. Click "Next" to proceed. - Finish the Process:
Once you’ve allocated the desired space, click "Finish" to complete the process.

With these steps, you should now have successfully extended your C: drive using Disk Management.


